How to Sand Concrete (By Hand or With a Sander)
Concrete has a long history of use, from the arena in Rome (dubbed the Coliseum after the Colossus statue that once stood in front) to modern day sidewalks and building supports. Its popularity and durability has reached the point that many homeowners now have concrete floors in their homes.
We’ll explain not just how to sand concrete, but also when you should do so and the types of finishes you can achieve. Here’s how to get a beautiful smooth finish, be it a floor or other concrete surface.
Can Concrete be Sanded?
You might think man-made stone would be impossible to sand. The good news is that concrete can be sanded with relative ease when the proper equipment is used, such as a good concrete sandpaper (made using diamond instead of sand).
There are also three different types of sanded finish you can achieve, depending upon the tools and amount of removed material.
See Also: Drilling Concrete Without a Hammer Drill
When to Sand a Concrete Surface
Obviously, you don’t need to sand a sidewalk or your home’s foundation. However, sanding a concrete floor or countertop the once-over can not only give it a more polished look, it can also give it the appearance of much more expensive natural stone materials.
Additionally, sanding can be an important step in resurfacing a treated concrete floor. The type of sander can have a big impact on the finished product, so be sure to plan ahead.
You will want to give a stained concrete surface special attention before sanding, especially if grease is involved. Simply mix one cup of trisodium phosphate (TSP) or two tablespoons of a good degreasing dish soap (like Dawn) into four gallons of water and mix well. Use a stiff brush to scrub the entire surface down.
Related: Wet vs Dry Sanding (Comparison)
Types of Concrete Finish
There are three types of finish you can achieve through the process of sanding concrete. Each one requires certain tools and a different degree of material removal. However, the end results produce three different and attractive results. From least difficult to hardest finish:
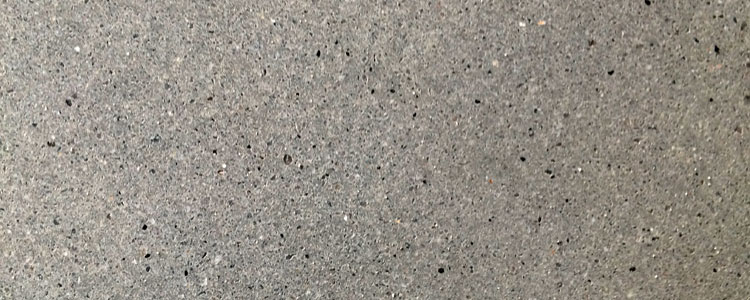
Smooth Finish
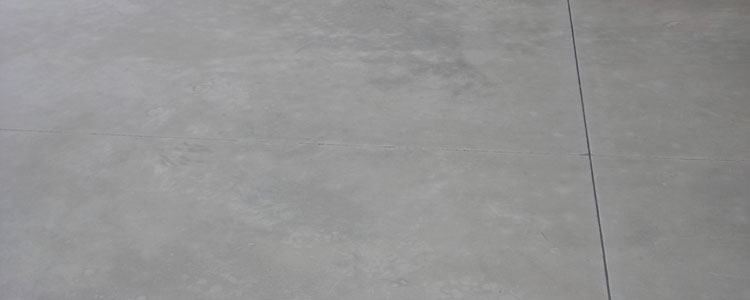
This method is merely a means to polish the concrete and can be achieved through hand sanding. As a result, this one’s best for countertops and similar surfaces.
Salt and Pepper Finish
By taking approximately 1/16th of an inch from the surface, you can achieve this attractive, speckled finish. With a salt and pepper finish, the sand is exposed but not the aggregate, resulting in a polished granite-like appearance at a fraction of the cost.
Exposed Aggregate Finish
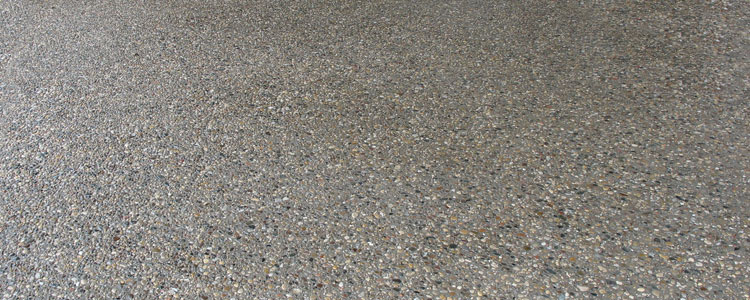
Depending upon the job, this can be one of the best finishes for floors and outdoor surfaces. It exposes the small stones (aggregate). A medium finish cuts 1/8th inch deep, while the large aggregate requires 1/4th inch depth.
Curing vs Finishing
One very important detail we must mention is that some types of finish are nearly impossible beyond a certain curing phase. This is especially true of exposed aggregate finishes. The general rule of thumb is:
- Within three days of pouring for a large aggregate finish
- Within a week for a medium-sized aggregate
- Scuffing requires the surface to be fully cured (30 days or longer)
- Smooth or salt and pepper finishes have no curing requirements and work just as well after the surface is fully cured.
See Also: Best Hammer Drills for Concrete
How to Sand Concrete by Hand
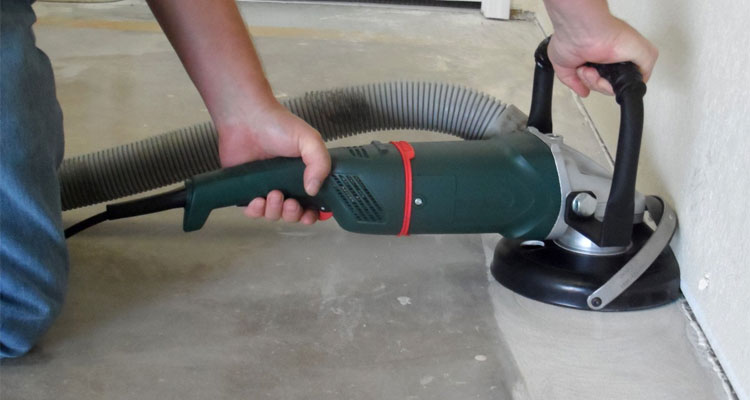
Perfect for polishing a countertop or handling small surfaces, hand sanding (using sandpaper, hand grinder, or random orbital sander) takes some patience but gives great results.
While you can perform an exposed aggregate finish by hand, the easiest hand finish is a smooth finish or scuffing.
Items Needed
- Diamond sanding pads (both handheld and discs for use with the grinder)
- Angle grinder or concrete polisher
- Patching slurry that matches the shade of your concrete
- Sponge or squeegee
Instructions
- Thoroughly wipe down the surface to ensure there are no debris that could leave pits.
- If aiming for a specific type of finish, measure and mark the necessary depth on the surface’s edge (1/16, 1/8, or 1/4 inches).
- Fill any holes or dents with a good patching slurry.
- Using the coarsest grade of concrete sandpaper, grind or sand the entire surface. Make sure to keep your pressure even. When using a grinder, keep it level to avoid an uneven finish. Note that concrete polishers require a constant supply of water to get good results.
- Use hand pads to get to spots the grinder can’t reach.
- Wipe the surface with your sponge to remove the debris, then move to the next finer grade of sandpaper.
- Rinse and repeat (literally) until you’ve reached the desired smoothness.
- Allow the surface to thoroughly dry (remember, concrete is porous, so give it a day or two for the best results) and apply a concrete sealer.
See Also: Other Angle Grinder Uses
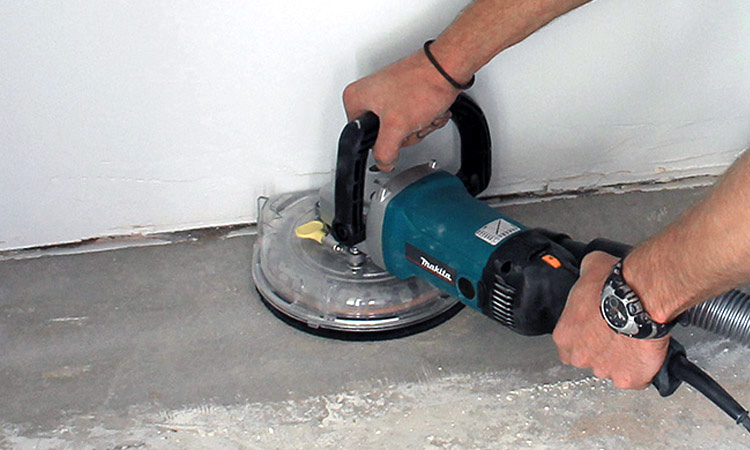
How to Sand Concrete With a Sander
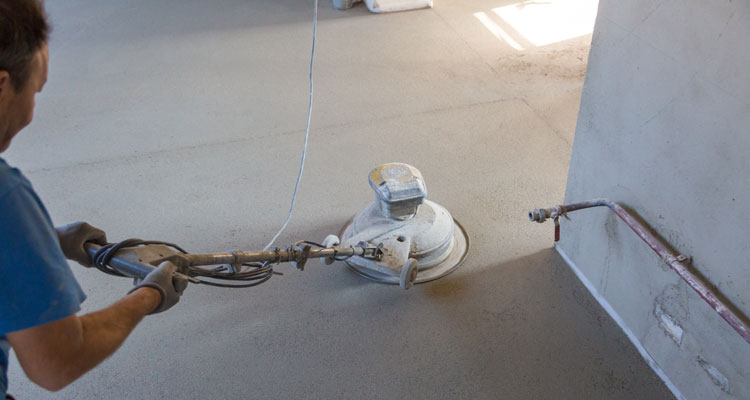
Working on a concrete floor or other large surface will require either a floor sander or a large degree of masochism. Note that you cannot sand one spot without risking discoloration. Thus, when working on an indoor floor or large surface, sand the entire surface regardless of how much actually needs worked on.
This keeps the surface texture even and will prevent stains or sealants from showing up in darker patches where the sanding was done.
See Also: How to Get Pet Urine Smell Out of Concrete
Items Needed
- Duct tape
- Epoxy resin
- Floor grinder (tough to use, but best for heavily uneven surfaces) or floor/pole sander (lighter jobs) – avoid wet models for best results
- Mop (preferably a squeegee or similar sponge mop)
- Plastic sheeting
- Protective gear (face mask, goggles, earplugs, rubber gloves)
- Shop vacuum (these can often be attached directly to the sander)
Instructions
- Remove all furniture from the room.
- Cover walls, vents, doorways, and other surfaces with plastic sheeting to protect them from dust and debris.
- Mop down the floor to remove any particles and allow to dry.
- Divide the floor into zones or sectors so you can focus on one section at a time.
- Beginning with a 30 or 60 grit sandpaper, start in one corner and move up the floor.
- Make additional vertical passes, covering half of the previous pass each time.
- Carefully go over bumps with a few passes until even, making sure not to leave the sander stationary.
- Fill any cracks or divots with epoxy resin and allow to dry before continuing to the next step.
- Starting in the far corner where you finished the first set of passes, reverse your course to end at the original corner.
- Make two more sets of passes, this time running horizontally in both directions.
- Clean the floor and apply an even coat of concrete sealer. Be sure to follow the instructions to allow the sealer to do its job.
- Switch to an 80 or 120 grit sandpaper and repeat steps 6 to 10.
- Clean the floor and switch to a finer grit paper.
- Continue performing steps 6 to 10 with progressively finer grit paper until you reach the industry ideal of 1,500 grit or better, mopping occasionally to get rid of any dust or debris.
- Examine the floor for any irregularities or traces of paint, giving it one last mopping.
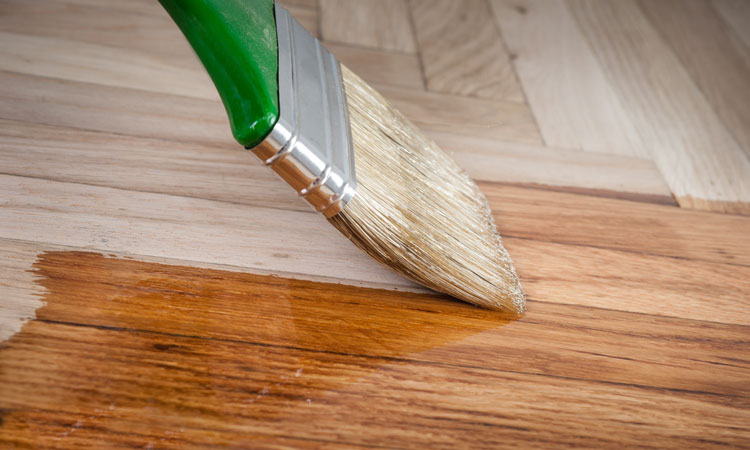
- If desired, paint or stain the floor as the final step.